Mastering IBM Vault 2.0: A Step-by-Step Guide to Simplified Secrets Management
Introduction
Are you tired of juggling scattered documentation and complex command-line syntax just to manage secrets, keys, and identities? IBM Vault 2.0 transforms the user experience with a redesigned interface that puts clarity and speed first. This step-by-step guide walks you through the key UI enhancements—from a revamped navigation bar to a visual policy generator—so you can onboard faster, adopt best practices, and gain deeper insights into usage. By the end, you'll know how to harness Vault 2.0 without needing advanced expertise.
What You Need
Before you begin, ensure you have the following:
- Access to IBM Vault 2.0 (version 2.0.1 or later) with administrative privileges.
- A modern web browser (Chrome, Firefox, Edge, or Safari—latest stable versions).
- Basic understanding of secrets management concepts (like policies and authentication methods) is helpful but not required.
- Terraform (optional) – recommended for policy deployment using the Vault Provider.
- Sample secrets or test data to experiment with the wizard and policy generator.
Step-by-Step Instructions
Step 1: Navigate the Revamped Navigation Bar
The first thing you'll notice in Vault 2.0 is the redesigned left-hand navigation bar. Instead of grouping features by technical category, it now organizes items by customer problems—such as "Secrets Management," "Key Lifecycle," "Identity Brokering," and "Data Protection." This change helps you quickly find the right tool for your task.
- Log in to your IBM Vault 2.0 console.
- Look at the sidebar. Each section now has a clear label and icon.
- Click on a section relevant to your work (e.g., "Secrets Management") to see its sub-features.
- Hover over unfamiliar items—tooltips explain each feature’s purpose.
- Customize the sidebar order (if allowed) by dragging sections to match your workflow.
Tip: Use the search bar at the top of the nav to jump directly to any feature or documentation snippet.
Step 2: Use the Onboarding Wizard to Bootstrap Tasks
The onboarding wizard is your shortcut to a working configuration. It replaces the blank slate with a guided questionnaire that produces editable code snippets tailored to your use case.
- From the navigation bar, click the "Wizard" icon (often under a "Getting Started" section) or go to Help > Onboarding Wizard.
- Answer a few simple questions: e.g., "What do you want to do?" (store secrets, rotate keys, or broker identity) and "What authentication method will you use?"
- The wizard generates a code snippet for you (HCL, CLI, or API call) that you can copy into your Terraform files or directly apply to the cluster.
- Modify the snippet as needed—for instance, change a path or policy name.
- Click Save to Cluster (if you want to apply immediately) or Copy to Clipboard for later use.
Why it matters: The wizard eliminates guesswork and ensures your configuration follows best practices from the start.
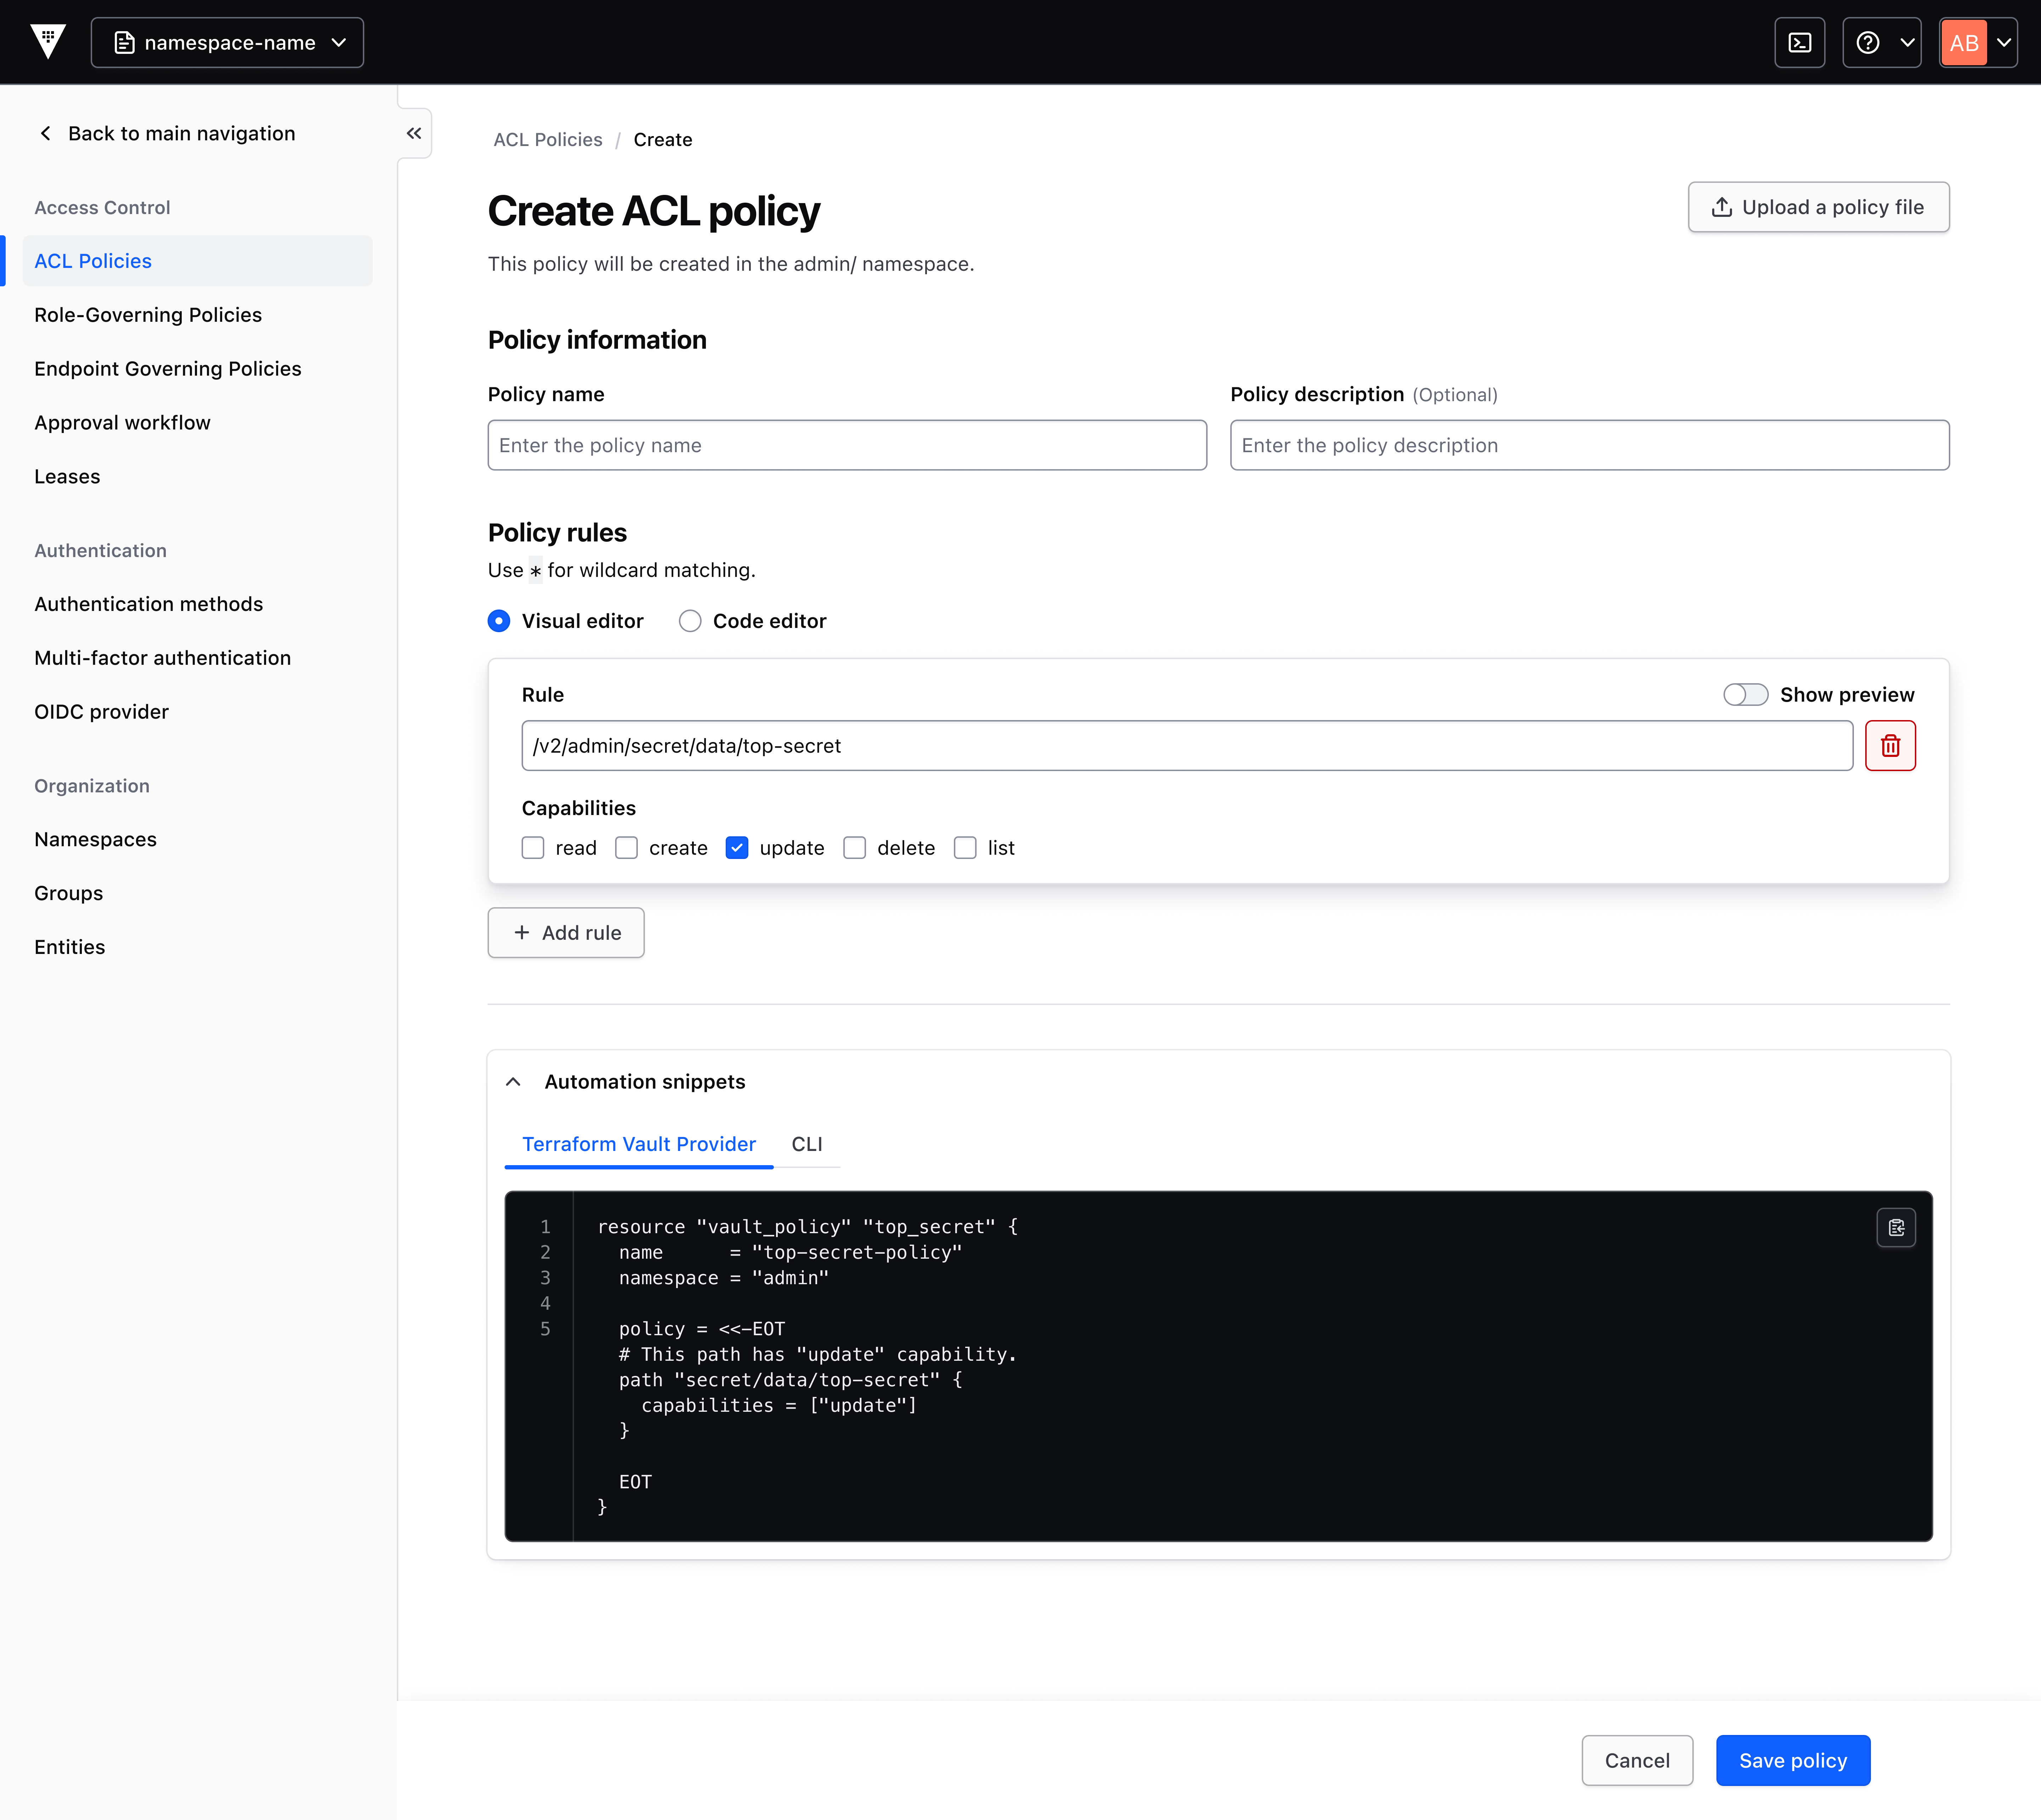
Step 3: Generate Policies Visually with the Policy Generator
New Vault users have zero permissions by default. Writing policy code by hand—especially with proper least‑privilege rules—is error‑prone. The visual policy generator provides a form that outputs ready‑to‑use policy snippets.
- Navigate to Policies > Visual Policy Generator in the left menu.
- Select the resource type you want to control (e.g., "Secrets Engine - KV") from a dropdown.
- Fill in the form: specify paths, allowed operations (read, write, list, delete), and any constraints (e.g., IP ranges or time windows).
- As you fill, the generator shows a preview of the policy in HCL format below the form.
- Check the Best Practices toggle to automatically add recommended rules (like denying delete on critical paths).
- Click Generate Policy. You'll see the final snippet with comments explaining each rule.
- Copy the snippet and paste it into your Terraform Vault Provider configuration (recommended) or click Save to Cluster to apply directly.
Note: The generated policies can be edited later from the Policies list if needed.
Step 4: Explore Introductory Pages for New & Existing Features
Vault 2.0 also adds introductory pages for each major feature. These pages summarize the feature's value and include a recommended quick-start action, helping you understand what you can accomplish without digging through external docs.
- Click on a feature you haven't used before (e.g., "Dynamic Secrets" or "Transit Encryption").
- You'll land on an introduction page with three sections:
- What is this? – a plain‑language description.
- Why use it? – benefits and common use cases.
- Quick start – a button or link that launches the onboarding wizard or a pre‑built template.
- Read the description, then click the quick‑start button to begin configuring the feature.
- After the quick start, a success message appears with links to more detailed documentation if you need advanced options.
Pro tip: Bookmark the intro pages for features you manage frequently—they serve as a built‑in reference.
Step 5: Leverage Improved Reporting & Visibility
Vault 2.0.1 enhances dashboards and reports to show consumption across secrets management, key lifecycle, identity brokering, and data protection. This visibility aids forecasting, planning, and governance.
- From the main menu, go to Reports & Dashboards > Usage Overview.
- View the summary cards: total secrets stored, number of active policies, authentication events, and key rotations.
- Click on any card to drill down into details—like which teams are consuming the most secrets or which engines have the highest activity.
- Use the date range filter to see trends over time (e.g., last 7 days, 30 days, or custom).
- Export reports as CSV or PDF by clicking the Export button for compliance audits.
- Set up Usage Alerts by clicking the bell icon on a dashboard card—notify a Slack channel or email when usage exceeds a threshold.
Benefit: These insights help you justify scaling decisions and identify unused resources you can decommission.
Tips for Success
- Start with the wizard whenever you try a new feature—it reduces the learning curve dramatically.
- Use the visual policy generator for all new policies; manually review the generated HCL to understand the syntax.
- Leverage the introductory pages as a quick reference instead of opening separate documentation tabs.
- Regularly check the reporting dashboard (at least weekly) to spot unusual usage patterns early.
- Combine the navigation bar revamp with your own mental model: if you think "identity," look under "Identity Brokering" first; if you think "secrets," start with "Secrets Management."
- Provide feedback to IBM—Vault 2.0 is iterative, and your input shapes future improvements.
- Check out external resources only after exhausting the in‑product help; the onboard wizard and intro pages cover 90% of common tasks.
By following these steps, you can go from a Vault newcomer to a confident operator in under an hour. IBM Vault 2.0 removes the need for a "PhD in Vault"—so dive in and simplify your secrets management today.
Related Discussions